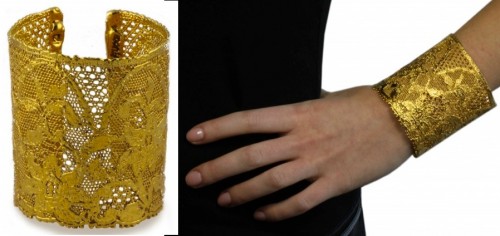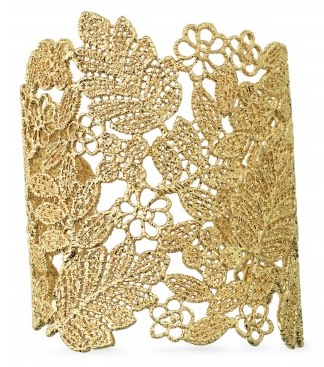
Lace jewelry is a hot trend for fall, and we love the look; so creating a DIY lace cuff and ring was a fun challenge for us. We knew we had to make the perfect ones for you to try at home and we think we nailed it. Let us know what you think after you try it! Our inspirations:
24K gold plated Doroty cuff in gilded lace by Monika Knuttson, gildedlace.com, $700-$800.
Stella & Dot Chantilly Lace Cuff, $98
Our DIY lace cuff and ring (because we had to give the ring a try too) exceeded our expectations! We learned a few tips along the way to make it easier for you, and easier for our next time, because we definitely will be needing a silver cuff and silver ring.
The result -- our DIY gold cuff:
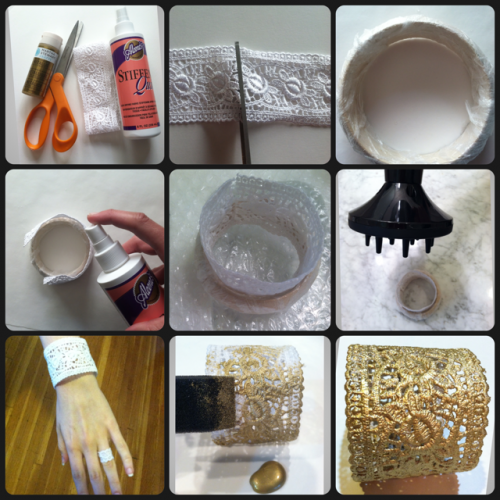
Tutorial:
Step 1 - Gather supplies: Fabric stiffener (usually found with glues at your local craft store), scissors, lace (found in the trim section)
Step 2 - Cut your lace to length that will fit around your wrist. You can always cut it shorter later.
Step 3 - Lay plastic down on your work surface and wear gloves. We wrapped a bangle with plastic wrap and used it as the form for our cuff.
Step 4 - Spray fabric stiffener on the lace and let dry. You may want to use your hands to work the fabric stiffener into the lace.
Step 5 - Dry fabric in shape you want it to become! We used the inside of our bangle because it was the perfect size and held the lace in place without bending it.
Step 6 - Tip #1: use a blow-dryer after spraying to speed up drying time!!
Step 7 - While the lace is still pliable, make sure it fits! It's still adjustable while you are repeating steps 4-6. Keep repeating them until the lace becomes hard. The lighter weight the lace, the quicker it will dry and the fewer times you will have to repeat these steps. (FYI: Our ring took 4 repetitions and our cuff took 6. Tip #2: One option we might try next time is to place a velcro dot as a closure with the lace just overlapping on our wrist.
Step 8 - Paint your cuff and ring with your choice of color. We chose Martha Steward Crafts Multi-Surface Metallic Acrylic Craft Paint in Gold.
Step 9 - ENJOY!


