Popcosmo

a blog for everyone and their mothers

diy

diy s'mores pops

RECIPESChloe Gordon1 Comment

There is a constant, agonizing battle between my brain and my stomach. My brain so desperately wants to be healthy/fit/lean but my stomach constantly craves carbs/dairy/sweets. It’s an endless struggle. Even though I hopelessly want my brain to be the winner of all internal duels, my stomach usually ends up winning. Ice cream after a long day at the pool? Absolutely. Eating a big brunch with friends instead of making it to the 11am spin class? You betcha. Skipping the s’mores dessert because “I shouldn’t?” Not happening, give me all the s’mores. 

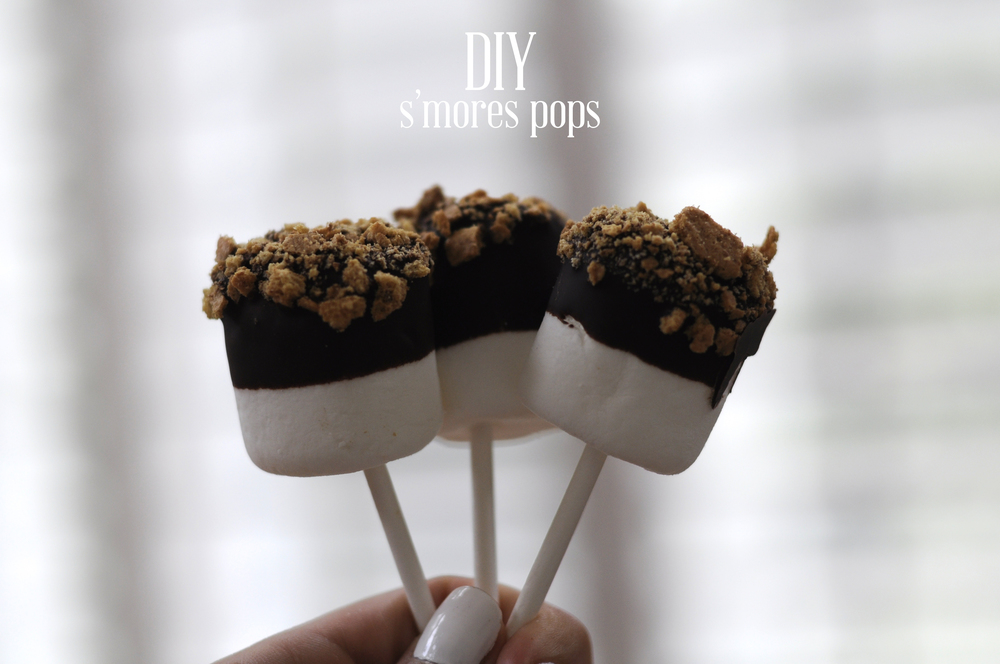
That being said, my cousin recently had her bat mitzvah and at her party they were passing around these cute little s’more pops. They were basically a marshmallow dipped in chocolate and then dipped in graham cracker on a stick. I had one and I was hooked. I needed to eat every single one of them. Imagining them throwing the extra pops away left me feeling light headed and a little sweaty. I probably ate nine or ten, give or take, and could’ve easily eaten way s’more. (hehe couldn’t resist the pun)

Now that I’m home, these pops have been consuming my thoughts. They’re seriously all I can think about. I told my mom about the conundrum that I was facing and she suggested that I make my own. I know my mom is a smart woman, but I didn't know she was that smart. Of course I should make my own. It would be easy, cheap, and allow my stomach an endless source of happiness… forget my brain. 

s'mores pops
marshmallows
chocolate
grahamcrackers
melting chocolate
smores pops diy
diy summer smokes pops

So if your stomach is anything like mine, you should most definitely make these for yourself. You won’t regret it, I promise. 

Ingredients for the S’more Pops: 
Graham Crackers
Dark Chocolate
Marshmallows
Sticks (to stick the marshmallows on)

Instructions:
-First start by crushing your graham crackers. The smaller the crumbs the better. I just put the big pieces in a plastic bag and crushed them up with my hands. It should look like a sand-like consistency 
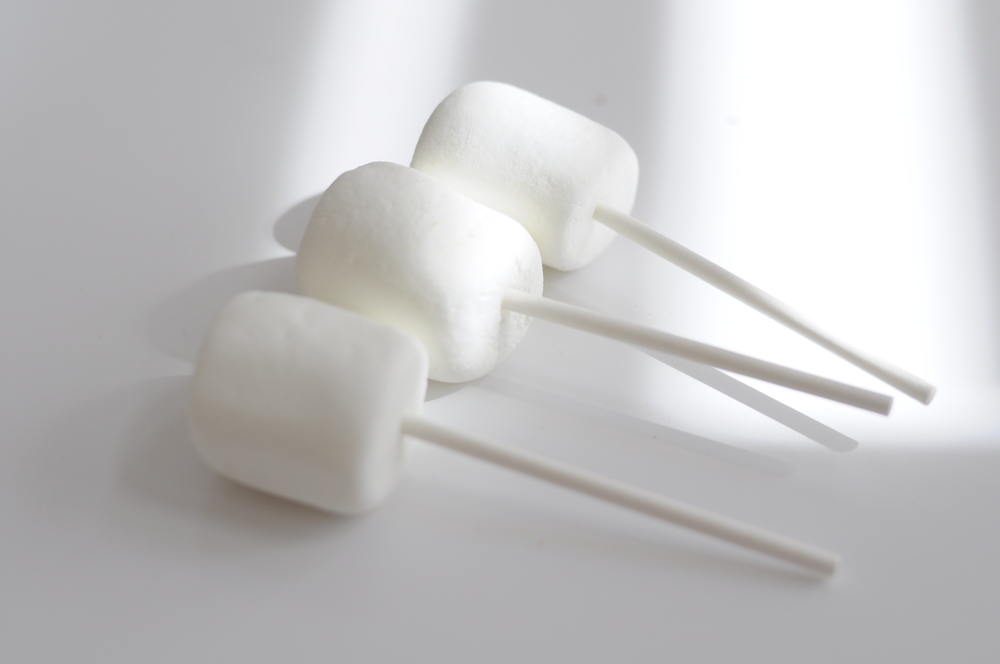
-Second, put your marshmallows on the stick. The stick should be right at the top of your marshmallow but not all the way through. 
-Third, melt your chocolate. I used a small bowl and put it on top of a boiling cup of water. This kept the chocolate melted and kept it from burning while I dipped the previous marshmallows. 
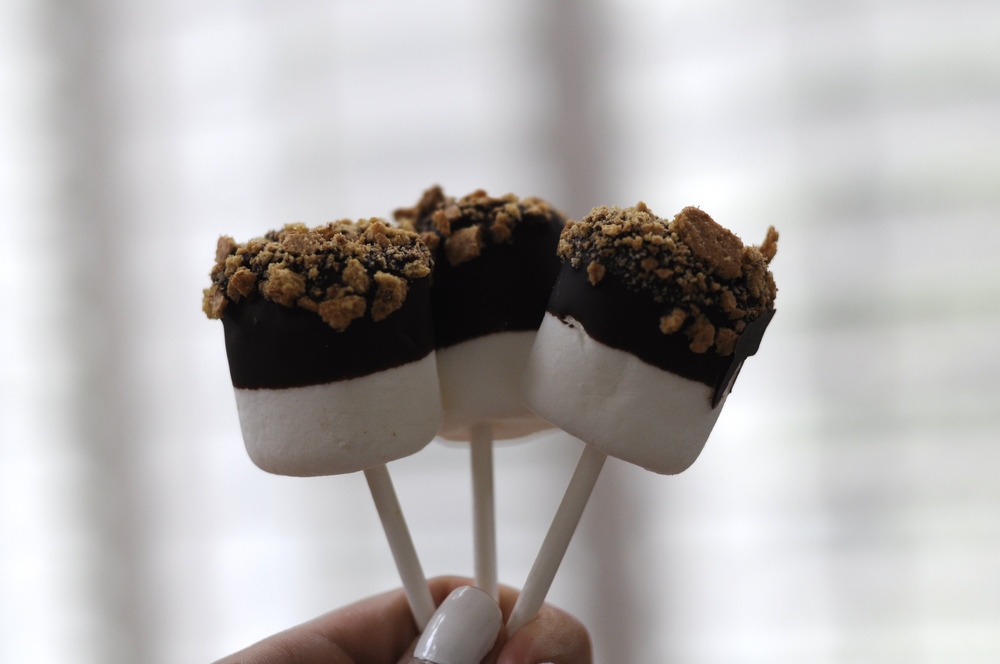
-Fourth, dip your marshmallow into the chocolate. Let the extra drip off before moving on to the next step.
-Fifth, dip your chocolate covered marshmallow in the bowl of crushed graham cracker. 
-Sixth, place your coated and covered marshmallow on a plate and once the plate is full, stick it in the fridge for a little while. 
-Seven, eat! Aka, the best step. 

And there you have it. A perfect summer treat. Let me know if you end up making them! 
xox
Chloe 

Galentines Day

FASHIONKim & Chloe3 Comments

I've never had a Valentine, but I'm sure if I did I'd spend my day being spoiled with chocolate, roses in every color, and maybe a new piece of jewelry. It would be a day all about me, all about love, and all about, wait, did I already say "me?"I like to think that the reason I've never had a Valentine is because boys are intimidated by me and my good looks, but I think it's probably due to the fact that every time I get close to an attractive boy my brain fails me. I stutter, I blush, I get sweaty arm pits, and so on and so forth. I just don't have the ability to be smooth around attractive boys. It's my only* fault in life. *sarcasm

bfe94dd940b3e75d440ca033064ad6fe

With Valentines Day right around the corner, yet a lack of an actual Valentine, I decided to host a little Galentines party (based on my favorite TV show, Parks and Recreation) with a few of my friends. We decided to make Valentines Day cards for our non-existant boyfriends, eat food (aka Costco cookies and Goldfish), and laugh at our inability to make eye contact with cute boys. Overall, it was a successful day and we had a lot of fun. If you don’t have a Valentines date, or even if you do, I highly suggest getting together with a bunch of girl friends and having a craft party. A little creativity is always fun and makes for good memories! I decided that I'd compile a list of a few cute Galentines Day crafts so that you can jumpstart your party hosting... you're welcome in advance. DIY heart pillow. Perfect for dreaming about holding a conversation with a cute boy. DIY watercolor heart cookies. Because food is a perfectly fine substation for a boyfriend. Food>BoysDIY Piñata love gram.  A great craft to make with a group of friends!

Here are a few pictures from our little party:

I hope you have a LOVEly Valentines day, especially if no boys are involved ;) xox Chloe

Energy Bites

DIY, EXTRAS, RECIPESKim & Chloe2 Comments

So, before I get into the real post, I just want to mention that a ton of people found out about my blog at school. It seemed like all of a sudden people were mentioning that they liked my blog or had seen my blog, and it was kind of weird at first. It’s not that I didn’t want people at school to know that I have an “internet life,” it’s just that it felt kind of separate. I’m not any different on my blog than I am in real life, but I do think of my blogging self as a whole different part of me. Anyway, I guess what I’m trying to say is that if you have a hobby or extracurricular activity that you’re passionate about, don’t worry if people find out about it. It’s who you are and it’s a part of you, regardless of what other people think about it. And, if you happen to be from school and you’re reading this… lemme know (;Ok, sorry, moving on to the real post now...

One of my friends from school brought some peanut butter balls to swim practice and she let me have one. Not only was it absolutely amazingly tasty, but it was the perfect snack to have right before a workout. She told me that she found the recipe on Pinterest so I did some digging and found it myself. I didn’t have all of the ingredients on hand so I kind of changed it around a little bit and I happened to really like the way they turned out! Here’s what I did, but if you want the real recipe to make these energy bites, click here.

Ingredients:

1 cup of dry oatmeal (old-fashioned oats) 3/4 peanut butter (I tried almond butter, but it wasn’t sticky enough) 1/2 cup chocolate chips 1/3 cup honey 2 table spoons chia seeds 1 teaspoon vanilla extract

Directions:

1. Pour everything in a bowl and mix it together. I found that using my hands to mix was much easer than using a spoon or whisk. 2. Put the mixed bowl into the fridge for at least half an hour 3. Roll into balls about 1” in diameter (or however big/small you want them)

Seriously, that’s it. These energy bites are so simple to make and so easy too! If you make them be sure to post a picture on Instagram or Twitter and tag us so I can see!

xox, Chloe