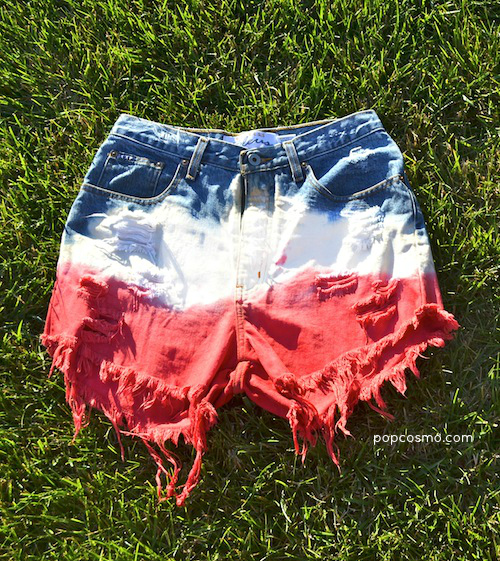
 DIY American flag shorts for the 4th of July a must-do this summer! And with July 4th only a few days away, what could possibly be better than another, an dare we say it, even funkier American DIY Jean Short than our last pair! But what we love about this pair is that they work ANY time of the year since you can use any color shorts, and you can dip-dye them any color! So tailor them for any time of year, for any occasion... like back to school in school colors?
We've bleached shorts and made American flag shorts and seen dip-dyed shorts in fun colors. We were inspired by the bleached shorts on Shop Sweet Life, and took their version way further by adding dip-dye into the process and bringing in some USA pride. We can imagine going wild with a zillion dip-dye options after July 4th: purple, pink, yellow... but in honor of 4th of July and American pride, we went good 'ole red, white and blue to create our American flag shorts. So here goes: follow these steps to create your own dip-dye, bleached jean shorts!
SUPPLIES NEEDED: Jean Shorts Rubber Gloves Plastic Bucket or Bin Part 1 (Bleaching): A Yard Stick Regular Bleach Vinegar Part 2 (Dip-Dye): Small disposable container Mixing Stick Measuring Cup Salt Dishwashing Liquid RIT Scarlet Liquid Dye
Bleaching White
1. Wear plastic gloves and create bleach solution by mixing 2 parts water and 1 part bleach in a plastic bucket.
2. Prepare your shorts by looping a ruler though the front or back belt loops.
3. Dip the shorts into the liquid to the desired depth. (The shorts should be sitting in the bleach solution up to the desired height and the yard stick can be sitting on the top of the bucket.) See photos at ShopSweetLife. Leave the shorts soaking for approx 30 minutes. The bleach might creep up about 1" of the fabric, so place a little less of the shorts in the bleach than you want to turn white!
4. After the bleach has turned the shorts as white as you like them, take them out and soak them in a sink, bucket, or bathtub with 2 parts water and 1 part vinegar for 5 to 10 minutes to stop the bleaching.
5. Lay flat, and let the shorts dry. Wash them ALONE.
Dip-Dye Red (or go crazy and do any color!)
Step 1: This is where the creative part begins! Make sure the bleached shorts are completely dry and cover your work surface to prevent any staining.
Step 2: Put on your rubber gloves and shake the liquid dye. Pour ¼ cup into the small disposable container. Add ½ cup of salt to the dye along with 2 cups of very hot water. (Microwave the water in a measuring cup for 2 minutes)
Step 3: In a plastic bin or bucket pour 1 gallon of hot tap water (Note: easiest to warm on the stove), a squirt of dishwashing liquid, and the dye mixture prepared in Step 2. Stir with mixing stick.
Step 4: Wet the part of the shorts you want to dye (in my case the bottom 1/3 of the legs). Squeeze out excess water. Now, start the dipping process. Holding the shorts, with the rubber gloves on, dip the shorts into the dye. Keep dipping the shorts in and out until you feel as though you’ve reached the desired color. (It took me about 5 times.)
Step 5: Wring out excess dye and rinse the part of the shorts that have been dyed with cool water. Then rinse the bottom part of the shorts in warm water, until the water runs clear.
Step 6: Wash shorts in cold water with detergent to help set the dye.
ENJOY your American flag shorts, or back to school shorts, or holiday shorts, or school pride shorts... and send us a photo!


