Instagram has started to become my favorite social media platform. You might be asking yourselves how I like it better than Pinterest, and there is only one answer - it’s more personal. I feel like my personality can shine through more on Instagram, plus it’s kind of a game with the likes and comments :lol: . The only thing is, there are so many new editing apps that are created everyday, it’s hard to stay up to date with the cool things you can do. Most instagram tips will tell you how to take better pictures, how to show your personality, and how to use the filters. But no longer do the plain old Instagram filters suffice - you have to use an outside source. I’m all for it! I love me some editing. So I'm going to share my most recent Instagram find with you: I recently started using the VSCOcam app (available in the app store), and I love it. It replaces all the other complicated apps because it’s easy to use and it has some really cool features. So no complicated Instagram tips, just one big tip and how to use use my favorite tool!
Here’s a little peek on how I typically edit a picture....
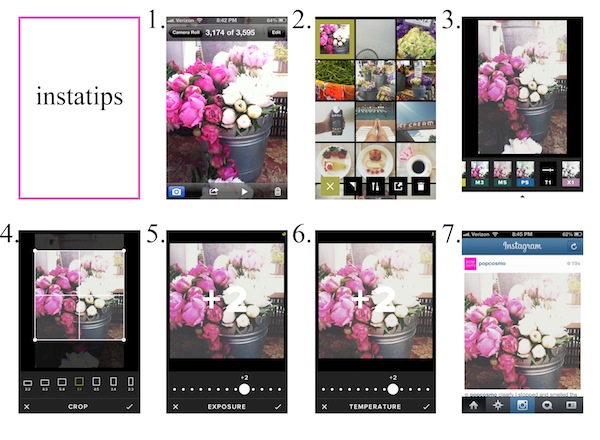
This whole process takes about five minutes - that's including taking the picture itself. It’s not too slow which is why I love using just one app. I’ve heard of people using up to three separate apps per picture, but for me that just takes away from the insta in Instagram.
{1} Clearly you have to choose your picture. I usually take a bunch and then pick from the best one. I have way too many pictures on my phone, but it just feels so wrong to delete them in case "who knows what" happens. And by that, I mean my little brother.
{2} I then open up my picture in VSCOcam.
{3} I love the filters that are already in this app. I almost always use the T1 filter because I like the white wash it gives the photo. Choosing the filter is totally up to you, and remember: your personality should shine through! I also like G3 and M5.
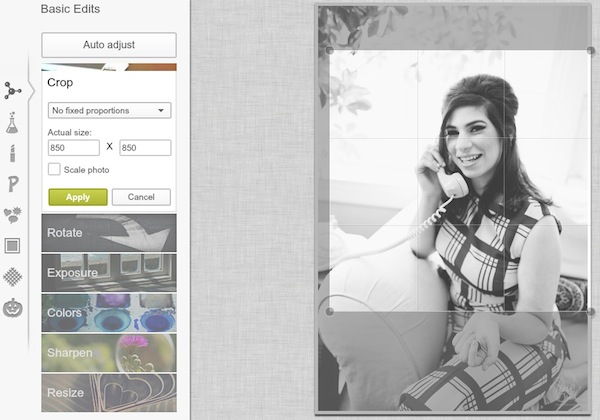
{4} I then crop my photo so that it’s a square so I can make sure I will like it once I post it to Instagram. If you have a taller/wider picture and want white space on the edges, I recommend the app Whitagram, another one of my favorites.
{5} I then jack up the exposure, because I like the effect it gives the photo. Clearly this is where your originality starts to shine through, and your tastebuds do the choosin’.
{6} Depending on the picture, I either slide the temperature up or down. This feature either puts more color into your picture or takes some away. See how my photo is just... softer?
{7} Lastly, upload to Instagram! Follow us and check us out to see what I've been doing lately with our photos - I'd love to hear what you think!
I hope this helps you find your own style a little bit! And I'd love to hear more...
How do you typically edit your pictures? Are you a fan of VSCOcam?


