Valentine’s Day is coming up, and handmade gifts are a surefire way to impress the ones you love. But who has the time?
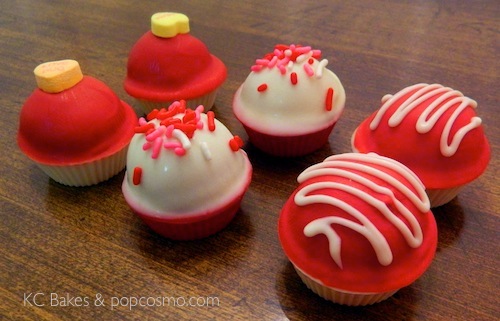
Kim from KC Bakes is back with yet another amazing creation! Although you could certainly dress up her cake pops, marshmallow pops and push pops for Valentine's Day, these Nutter Butter Love Bites are amazingly delicious, simple to make and easy on your wallet.

Taking less than an hour to create, they only involve 3 ingredients and can be made for less than $20! Here’s what you’ll need…
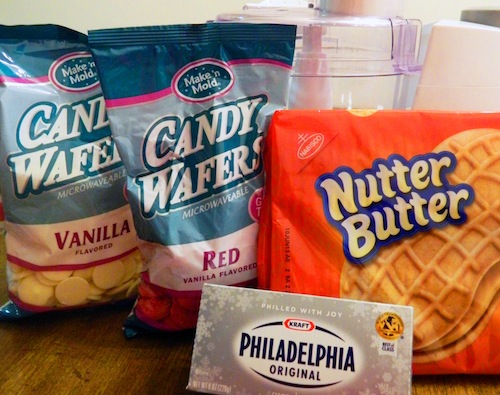
Nutter Butter Love Bites Yields 24 bites
Ingredients:
• One (1) box of Nutter Butter cookies
• One (1) 8-oz package of Philadelphia cream cheese, brought to room temperature
• Two colors of candy melts
Supplies Needed:
• Food processor
o If you don’t have a food processor, you can use a Ziploc bag & rolling pin
• Peanut butter cup mold tray (found at any craft store)
• 1.5” cookie scoop (not crucial, but it’s helpful to make the same size bites)
OK! Let’s get started…
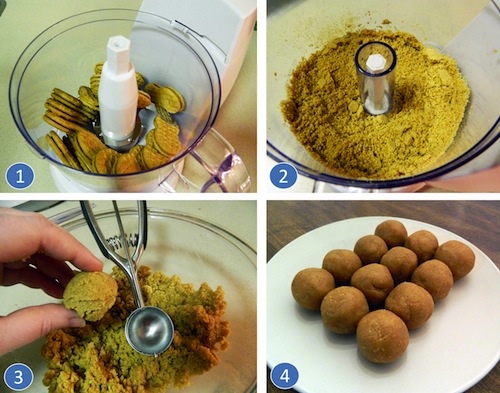
1. Place the cookies into the food processor. If you don’t have a food processor, place the cookies into a large Ziploc bag, and use a rolling pin to smash them into crumbs.
2. Grind the cookies until you get a fine crumb consistency. You don’t want any big pieces of cookie remaining, or the mixture will not absorb the cream cheese.
3. (a) In a medium-sized bowl, mix in about a 1/2 of a block of cream cheese… you may end up adding the whole block, but it’s better to start off with a small amount, and add more as you go. I found it easier to use my hands to thoroughly combine the crumbs and cream cheese. (b) A good test to know if you’ve added enough cream cheese… the mixture should hold its shape when squeezed in the palm of your hand, or measured out with a cookie scoop.
4. Roll the mixture into smooth, round bites. Place them into the refrigerator for about 10 minutes, while you melt your chocolate.
Fill the peanut butter cup mold wells about two-thirds full.

Place the peanut butter bites into the chocolate. If you over-fill the well, the chocolate will spill over the sides and leave an edge around the bites. If you under-fill them, you can see it will leave crevices in the mold.

Once you’ve filled all of the wells in the mold, place the tray into the refrigerator. After 5-10 minutes, the bites will easily pop out of the mold.
Holding the bite upside-down, dip it into your second color of melted chocolate, just up to the edge of the cup.
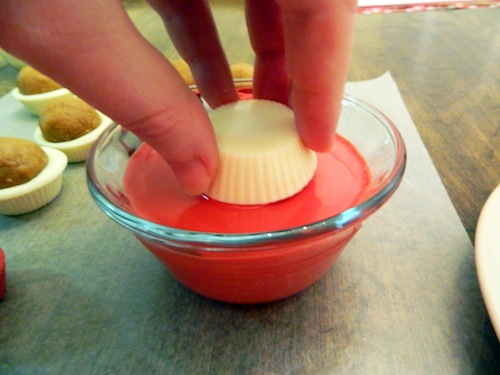
Allow some of the excess chocolate to drip off into the bowl, then place the bite on a plate to dry. Jazz up your bites by adding some conversation hearts or sprinkles to the tops before the candy hardens. You can also let the top chocolate harden, then drizzle on some of the other color chocolate.
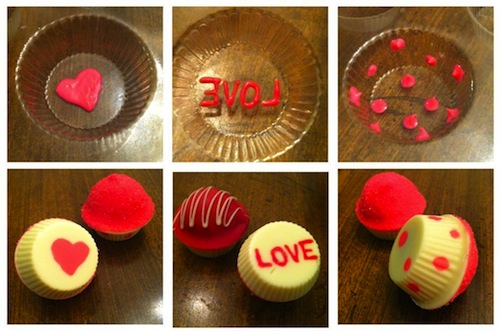
If you want to get really creative, use a toothpick to draw some decorations into the mold wells (top row, shown below). Put the tray into the refrigerator and allow these designs to harden before filling the well with the other color chocolate, then insert the peanut butter ball.
Now that you have the sweetest little homemade treats, find a festive way to package them to add that final personal touch.
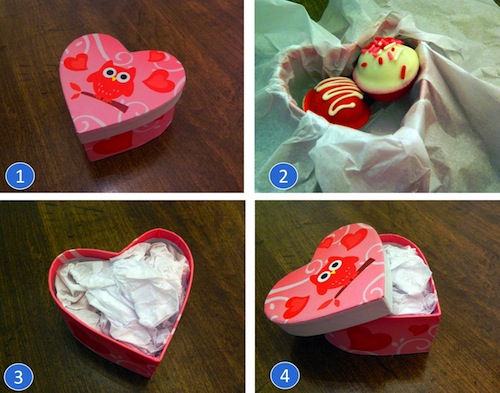
1. I found this box at Michaels for $1!
2. Line it with tissue paper to protect your treats.
3. Tuck the paper into the box so that there is nothing hanging over the edges.
4. Voila! The perfect little gift of love that any friend or significant other will be truly touched by.
I hope you’ve enjoyed this little tutorial!
~ Kim from KC Bakes
For more recipes, check here from KC Bakes, and also follow her around the web… Facebook, Instagram & more!

