Popcosmo

FASHION

Back to School Outfit

FASHIONKim & Chloe13 Comments

Back to school outfits are hard for me because I'm used to wearing uniforms.  This is the first time I haven’t had a uniform since 5th grade. In middle school my uniform consisted of a cotton t-shirt with my school’s name on it along with a pair of kaki shorts or pants. Then in 9th and 10th grade I had to wear a fancy collared shirt tucked into a fancy kilt. Then 10th grade round two and 11th grade I could basically wear my pajamas all day… online school for the win. However, now that I’m in 12th grade I finally have the freedom to wear whatever my little ‘ole heart desires. In fact, we basically have no dress code rules, except that we can’t wear spaghetti straps. Which happens to be fine by me. We can even wear open-toed shoes which is absolutely amazing. This idea of being able to wear whatever the heck I want is kind of awesome. I’m trying to not wear leggings to school until I absolutely have to, and so far my streak is going strong (even though I’ve only been to four days of school).

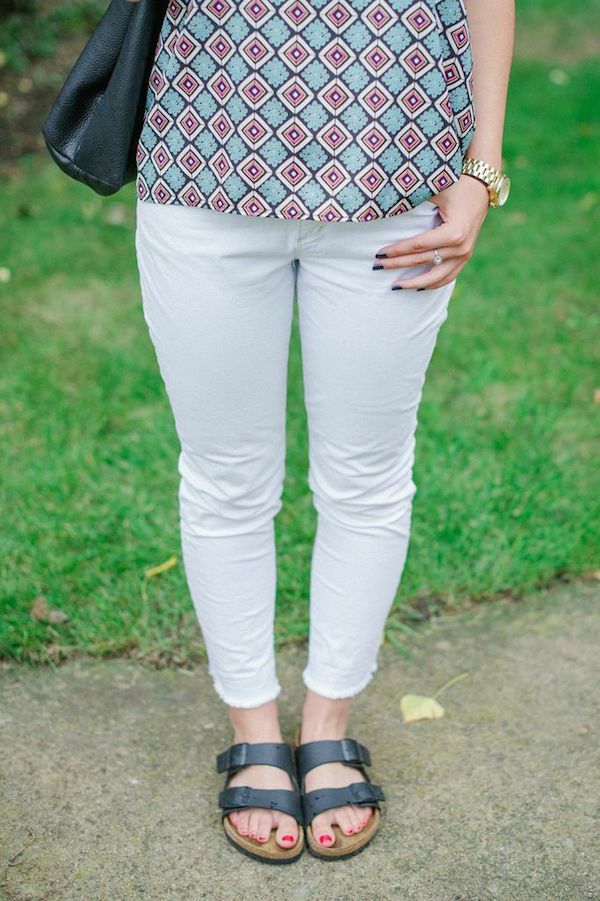
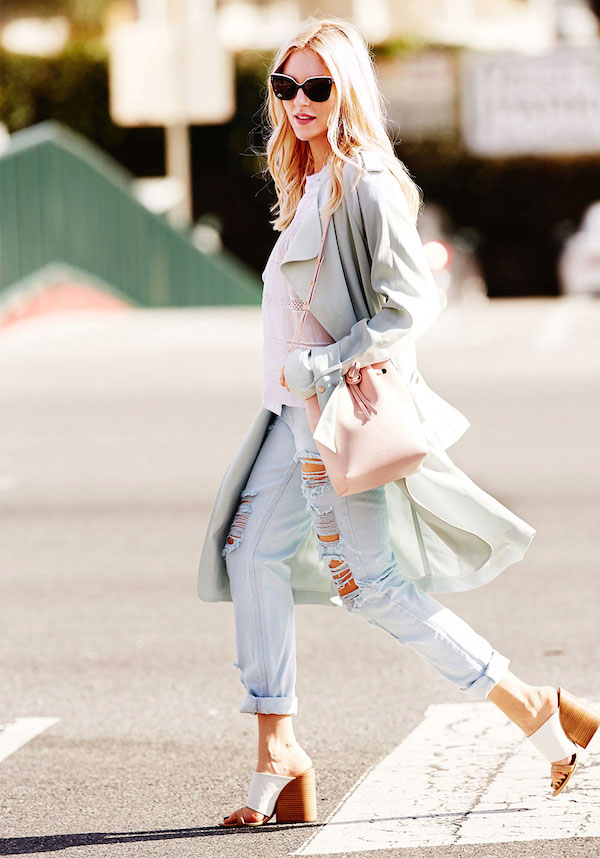
This is an outfit that I plan on wearing next week… just swap my never leave home without-it keep 'cause it keeps my cellphone chargedtote for a backpack. It’s simple, it’s easy, and I think it’s pretty darn cute, especially the back of the top! And the price is right on the top and Mint Julep has tons of cute options on boots, tops, scarves... you name it. Let me know what you think in the comments below — I’d love to hear your thoughts!

top (c/0) + pants + shoes + watch + bag (c/0)

shaylnneimaging
shaylnneimaging

Fabulous photos by Shalynne Imaging. Go give her some love! xox Chloe

First Day Of School

FASHIONKim & Chloe11 Comments
back to school outfit

My last week of summer is officially coming to and end. I don’t know how the heck summer went by so fast; I seriously still feel like it’s June. But school is about to start and that means constant outfits that don’t just consist of exercise clothes. Also, I don’t know if you all know this, but I will be going back to real school which means I will be a new kid my senior year. This is the first year that I don’t have a uniform since 5th grade so I think my mornings will lead to very messy floors. Anyways, this is what I am planning on wearing my first day of school. I think it says “I want to look cute but not like I’m trying too hard.” Right? All I know for sure is that I like it so… ;)

shoes | jeans | top | backpack | nail polish | water bottle

What are you planning on wearing your first day of school? I’d love to hear!

xox Chloe
DIY Graphic Tee

DIY, FASHIONKim & Chloe6 Comments
blah blah blah diy graphic tee | popcosmo

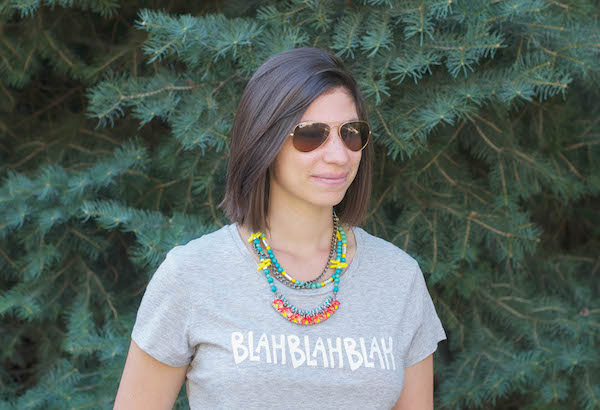
What's one item I could wear with everything? A graphic tee... every time I walk into J.Crew I want another one! But they are breaking the bank, so I turned to my trusty Cricut Explore, which had been getting dusty while we moved and I was away this summer. It's definitely time to start playing with it again since it is so versatile and makes the most complicated craft ridiculously easy! The best part? That's my handwriting. Mhmm. I officially have the coolest shirt around town - my own DIY graphic tee.

tee: Gap | necklace: Ela Design Studio | sunnies: Ray-Ban

Supplies: T-shirt Cricut Iron-on Cricut Iron Ironing board Tea Towel or t-shirt

blah
blah

Feel free to use our .png file below! Then we can be twinsies with the same shirt ;)

Directions: 1. Cut Cricut Iron-On a little larger than the words you are printing and place it shiny side down on mat. Load into the Cricut and follow directions. 2. Be sure to check the box for "Iron On" so that your words will be backward. (This will make sure that when you actually iron on it will be in the right direction) 3. Peel the extra Iron-On material off of the transfer sheet and make sure that no little "extras" are still on your design. 4. Center the design on your shirt and iron onto shirt with a tea towel in between the iron and the Iron-On material. 5. Sit back and admire... then wear what's sure to become your DIY favorite graphic tee and rake in the compliments.

cute graphic tee
cute graphic tee
DIY graphic tees
DIY graphic tees
blahblahshirt
blahblahshirt

Disclosure:  We are members of the Cricut Blogger Network and received product in exchange for review but as usual all opinions are 100% our own. 

Behind the Gram

EXTRAS, FASHION, RANDOM STUFFKim & Chloe13 Comments

These Behind the Gram posts have been popping up lately, and I decided to jump on the train before it left the station. This post is quite embarrassing, but please know that if you laugh you're laughing WITH me and not AT me.

What it looks like: omg, just went shopping and have to show off my new fabulously perfect shirt.

What really happened: yeah, this shirt is fabulously perfect and I wanted to show it off, but when I was shopping at the store I picked up a size below my size and then bought it without trying it on. I then proceeded to ask the guy at the checkout if it was final sale (it was) when I was buying it and I still bought it without trying it one (why?! i never do that!). My mom continued shopping around the store and I started freaking out that I bought the wrong size. I then asked a different sales person if I could try on a dress so that I could actually try on this shirt. It was a size too small. But, I accidentally ripped off the tag when I was taking it off after trying it on. I then went back to the sales guy and told him that I “accidently picked up the wrong size and the tag fell off and I don’t know how that happened but can I exchange this shirt for a size bigger.” Long story short, this shirt was a nightmare to buy but well worth it because I got an Instagram out of it and it's fabulous and it was on super sale.

What it looks like: four professional models on the loose in nyc. everyone beware because we feel more fabulous than we look.

What really happened: I saw someone post an Instagram in Lincoln Center that was super cute so I wanted to recreate the picture. I made Frannie, Caroline, and Sammy hunt for this wall. We then found it and made a random lady take a few pictures of us. The first time she took the pictures they didn’t turn out well so I asked her to take them again. She seemed annoyed, but I really needed her to get the shot. Also, this random dude (it wasn’t Bill Cunnigham, but I’m convinced it was someone on that caliber of awesome) was taking our picture too?

What it looks like: hehe, just me being clever and messing around with my macaroons and the focus on my camera.

What really happened: The other interns and I went to Broadway Bites for lunch one day, I brought my lunch that day but still went because I wanted to bond with the other interns and get out of the office for half an hour. I was browsing around while the other girls were ordering their food and I found some macaroons. They were really expensive so I told the guy working the booth that “I’ll be back” so I could nicely leave without saying that his macaroons were too expensive for me. Then the other interns told me I should buy something so I went back to the macaroon guy and bought a macaroon. He remembered me and gave me one for free. I’m pretty he gave me a free one  because I looked good in my party pants because I had already gotten the FedEx guy to give me a reduced price on a package I had to ship earlier that day. I swear, THE PANTS ARE MAGIC. Also, I picked red and blue because America was playing in the World Cup that day and I wanted to seem festive.

What it looks like: chloe here, reporting live from trendyville. I just happened to stumble in this coffee shop with fancy tiled floors. Also, I’m part of the Birks train so I’m cool.

What really happened: I had planned my whole day in nyc around finding a this one super trendy ice cream place. It was a 25 minute subway + walk from my apartment and it was at least 100 degrees out but I really wanted fancy ice cream. I had the address pulled up on my phone but I couldn’t find it anywhere! I was so frustrated and so hot. But on the way to the ice cream shop I stumbled across Lafayette. I bought a coffee just so I could take a picture of my feet on their floor. As I was paying for my coffee I accidentally pulled out a tampon and a guy was at the register, but I was so hot and so annoyed I couldn’t find my ice cream place that I didn’t even care. Then I took like 89052431 pictures because I had to make sure it was in focus. I then got out of there super fast because it was an awkward fest.

What it looks like: Just casually showing off my new kicks.

What really happened: my mom can’t really take pictures that well so I made her be my model. she had to lay on the floor and kick her feet up so we could take a cute picture of these shoes. Her back hurt that day so she was mad that she had to lay on the floor for 10 minutes while I tried to take the perfect shot. Also, we hung a huge white piece of paper right in front of our door because that’s where the best light was. I’m pretty sure our neighbors and mailman thought we were insane.

Hope you like this post! If you want me to do a round two then let me know! xox Chloe
Try this T-shirt Tie Dye

DIY, FASHIONKim & Chloe26 Comments

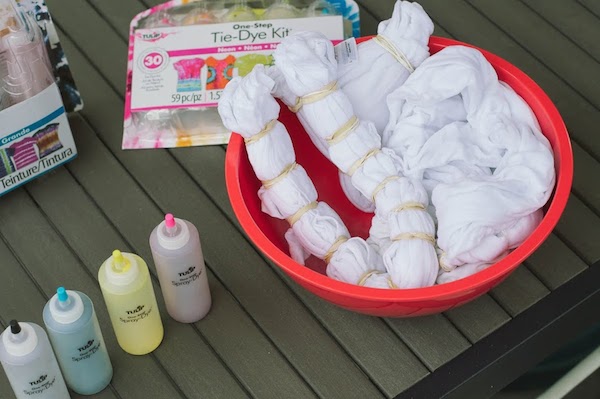
One of our favorite summer projects is tie-dying and as much as we love tie-dye, you know we like to keep it simple... which is why we are such huge fans of Tulip One-Step Tie-Dyes and have been using them for years for all of our projects (see tie-dye shorts and tie-dye beach sheet). We were ready to jump on the Tie Dye Your Summer bandwagon and once again turned to Tulip because they come with bottles that you simply fill with water and you're ready to go. Even gloves come in the box, plus some ideas. All you need is something to tie-dye and a cool idea! t-shirt tie-dye

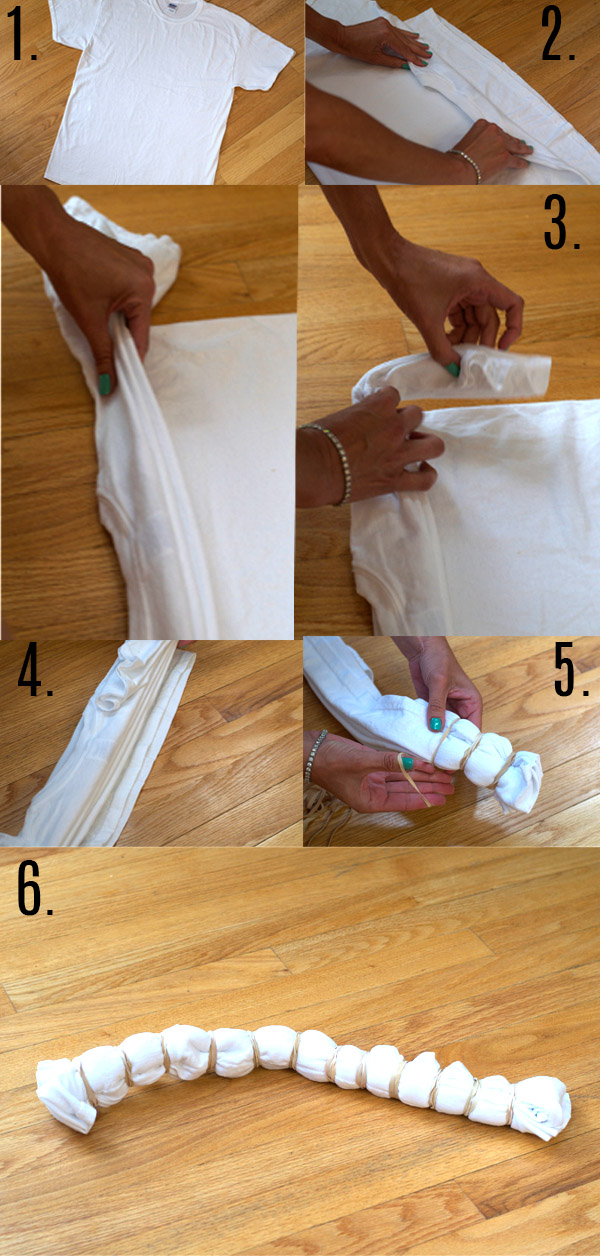
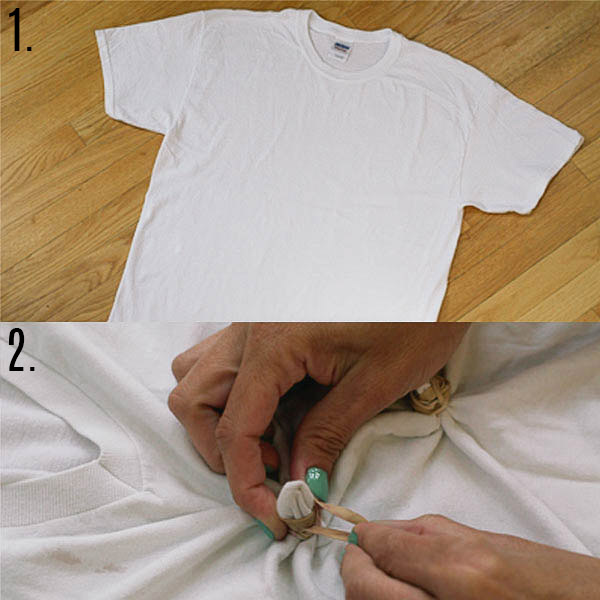
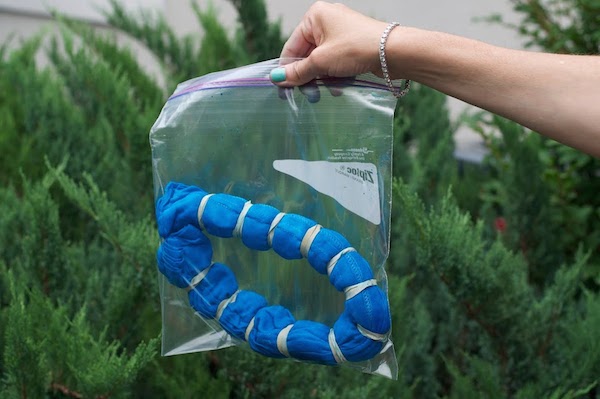
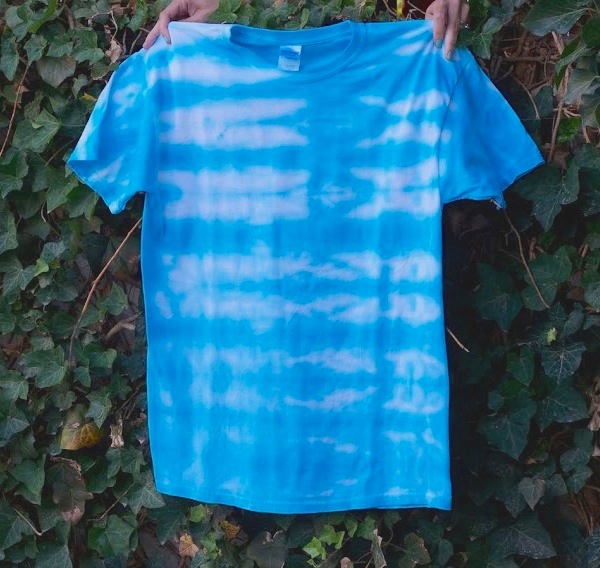
Striped T-Shirt Tie Dye Prep cool tie-dye patterns 1. lay t-shirt flat and get rid of wrinkles 2. pleat the shirt from top to bottom (you can fold it in the middle if it's easier to handle it) 3. fold sleeves in last, pleating them as well, and tucking them under 4. you should have a flat pleated shirt 5. wrap rubber bands around at intervals, making sure the pleats stay intact 6. your t-shirt should look like a centipede when ready to tie-dye

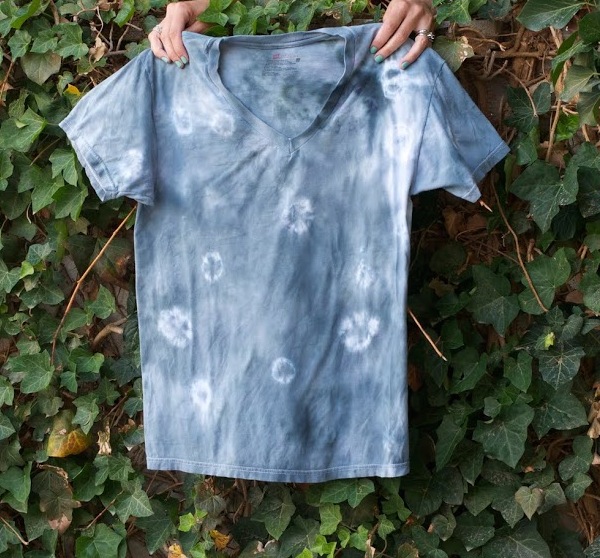
Dotty T-Shirt Tie Dye Prep Spotted Tie-Dye 1. lay t-shirt flat 2. pinch sections of the t-shirt and wrap the rubber band tightly around. The larger the piece sticking out the top, the larger your circles will be and the more rubber bands you use, the bigger your white space around the circle will be. You could pinch both front and back, but we pinched the front and back together (i.e., the back of the shirt was in the rubber bands you see) and it looked fantastic while saved a bunch of steps.

Once you have your shirt(s) ready, wet them thoroughly. You could definitely do this step first, but we found it was easier to work with dry shirts. tie-dye steps

Gather the tie-dye supplies  - most of which will be in your Tulip One-Step Tie-dye kit + protection for whatever area you will be tie-dying in. We suggest tie-dying in the grass, if you can, since the area will be stained. Tulip tie-dye supplies

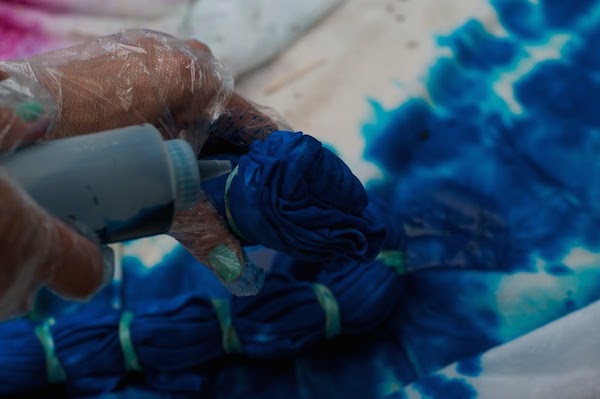
Add water to the color bottles you choose and you are ready to tie-dye! It couldn't be more simple, then add color to your shirts directly from the bottle.

tie-dying steps

Once the color has been applied, place them in a bag for 6 or more hours (we left ours in the bag overnight) because we're lazy like that. steps to tie-dye

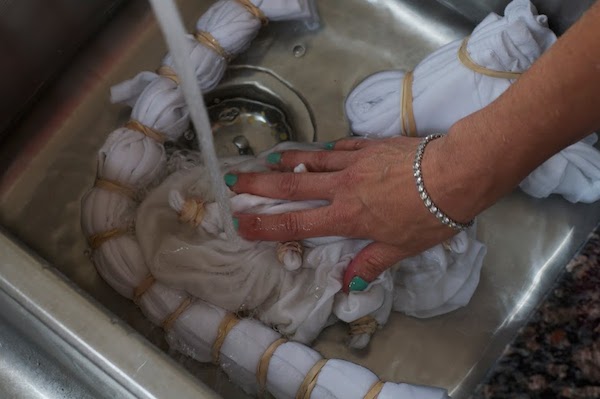
Remove the shirts from the bags and rinse them in cold water until the water runs clear. It takes a while, but once the color is out, it's gone and your tee is colorfast. Follow the instructions for washing and drying and then enjoy your new shirts. how to make a striped tie-dyehow to make a spotted tie-dye

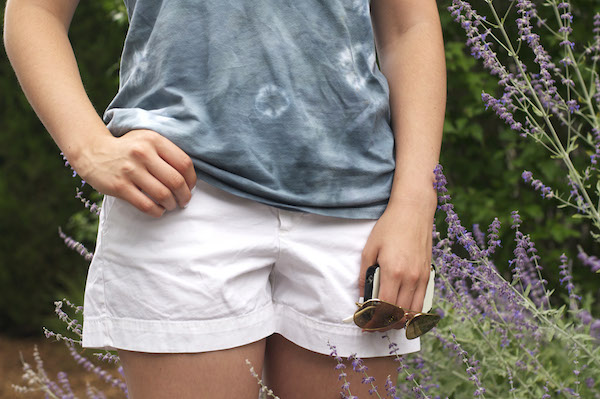
Voilà, one old tee that was stained turned into a new tee that looks amazingly cool and a new tee that looks much better than plain white! We might cut the neckline on the blue tie-dye t-shirt, but we really love how it turned out.

Follow I Love To Create for some fab & fun creative inspiration on Facebook, Twitter, Pinterest and their Blog. Perfect boredom busters! Get creating!

What are you thinking about tie-dying?

xo ~kim & chloe

 Thank you ILTC and Blueprint Social for sponsoring this post. All opinions are our own, as usual! 

Bucket Bags

FASHIONKim & Chloe12 Comments

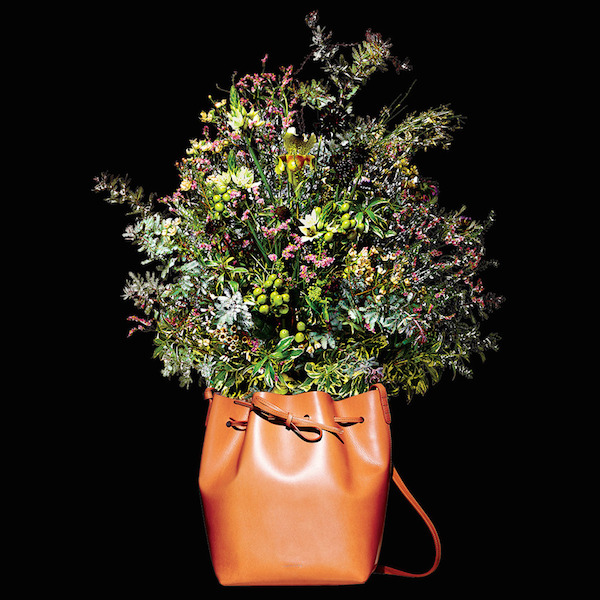
hot bucket bags for 2014 via New York

While Chloe has been in fashion mecca this summer, I've been settling in, unpacking boxes, and traveling with my son for sports. Needless to say, fashion and blogging have taken a backseat to family. I've asked Chloe to fill me in on what she's noticed on the streets of New York, always one of my favorite ways to spot new trends. While bucket bags are not a new trend, they are heavily in rotation among the fashionistas in the city this summer.

These are a few I'm taking a look at, with some budget options thrown in the mix. Since I recall this trend from when I was a teen, I'm not sure if I'll be jumping on the bucket bag bandwagon, but Chloe wanted a few options, so I pulled together a few for her... along with some that just caught my fancy.

cute bucket bags via Peace Love Shea

The go-to Mansur Gavriel ones above are everywhere in a mini size, although I'd call it manageable one since one that's too big simply becomes a dumping bag for moi, but here's a budget version that has gotten great reviews. And procrastinators rejoice since this Tod's version is 50% off and available to our European friends too! Perfect for fall is the calf-hair bucket bag in leopard. I would absolutely rock it with all black, but I've most definitely been wearing leopard with prints and love the juxtaposition. If you want to stray from leather, this tan nubuck version is so sumptuous, or check out this leather look budget option by Target. And if you decide to invest and splurge, then why not go with this vintage Chanel piece in impeccable shape and glorious texture? It's also available in peach. Yummy.

Are there bucket bags in your future (or present)?

xo ~kim